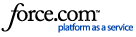
There are various Relax actions to reduce to fit the specified inventory settings like
- Minimum unit facings
- Minimum units
- Case Multiple
- Days of Supply
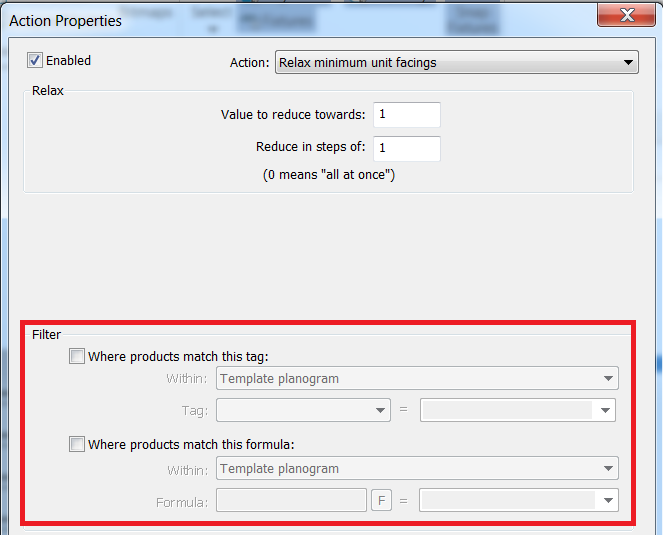
You can choose one from Action drop-down list as per your requirement on the Reduce to fit phase:
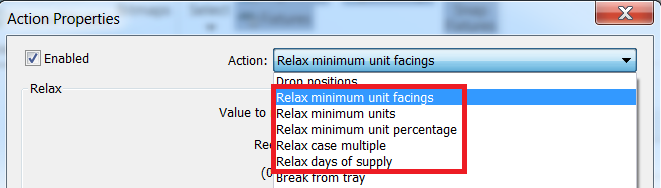
Use the following steps to configure the action:
- Specify the value or percentage to which the selected inventory setting can be reduced in the Value to reduce towards field
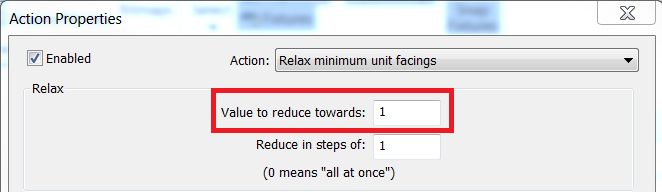
- Specify the incremental steps by which to reduce the value or percentage in the Reduce in steps of field. If you specify 0, the inventory setting is reduced to the specified value completely instead of gradually
-
Configure Filter settings to specify the products to be affected by the action
Notes:
- Select a check box to specify whether to identify products that match a specified tag or formula.
- Select an option from the appropriate Within drop-down list to specify whether to identify products using data from the template, auxiliary, or target planogram. For revision templates, you also can identify products from the template that do not exist on the auxiliary template.
- To select tagged products, select the tag field from the Tag drop-down list, then select the appropriate value from the = drop-down list.
- To select products that match a formula, click F to specify the formula, then enter the value to compare to the formula result in the = field.
- If both tag and formula options are specified, they are combined. Only products that meet both criteria are affected by the action.
- If multiple target planograms are selected in the Targets to generate list on the Planograms tab, the drop-down list next to the Formula field displays values for the first selected planogram in the Targets to generate list. You can select one of the available values or enter a different value.
- Configure Priority sequence settings to determine the order in which products are adjusted by the action
- Select an option from the Formula applies to drop-down list to specify whether the Priority sequence formula uses values from the template planogram or target planogram
- Click F to specify the formula to determine the priority of products
Note: If no formula is specified, products are affected in alphabetical order.
- Select an option to determine if products are adjusted in ascending (Smallest first) or descending (Largest first) order, based on the formula values for each product.
- For actions that allow it, from the Groups drop-down list, select an option to specify how to process groups of products:
Note: The Groups options apply only to actions in the Reduce to Fit and Fill Out phases that modify positions already merchandised on the target planogram. For example, you can use it to remove positions or relax or boost position facings for products in the defined families. If you selected Process whole families at the same time, select an option from the Sequence families based on drop-down list to determine the order in which product families are adjusted.