How to assign Web UI or PC screens to a specific user role for Versions 9.1.1.x:
This is controlled through taskflows.
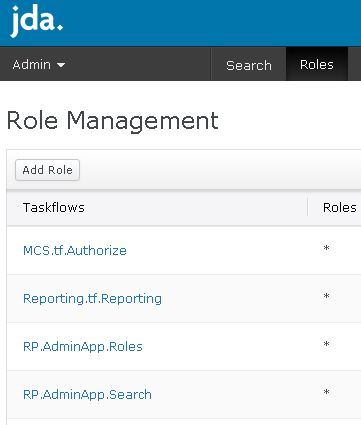
From Web, under Administration and Roles, taskflows will be displayed with their roles.
Out of the box, every role has access to every taskflow (as indicated by the *).
Perform the following.
1. Create new Roles, and make sure SUPER user ID has access to them.
2. Assign users to those new roles.
3. Login as SUPER.
4. Remove out of the box access that all roles have to all taskflows.
a. Select Administration
b. Select Roles
c. For Every taskflow:
1. Modify the taskflow by clicking on blue text link.
2. Unselect ‘*’ as a role. See screen shot below.
d. Access to roles and taskflows have been removed.
5. Give new roles you created access to the needed taskflows.
a. Select Administration
b. Select Roles
c. Click “Add Role” button. A messasge will appear, asking which role you want to manage?
d. Select your new role created in step 1 above.
e. Select Taskflows for this role.
f. When main form is returned, your new role will be created that has access for specified taskflows.
For Versions 9.1.2.x:
Roles are assigned to menus and it is assumed that every role in that menu will have
access to all of the pages within the menu. However, the new menu provides capability
of restricting access to a specific page for one or more roles.
Perform the following.
1. Select Extensions
2. Select Menu Editor
3. Select your Menu
4. From menu, list all roles that should access this menu.
5. From Pages and Group tab, locate the page that should be restricted. Expand page box.
6. Add roles to the page that should have access to page. Do not add the role that needs
to be restricted.
7. Select Apply
8. Finish on Review tab
9. When restricted user logs in, they will not have access to that page.